GPS traces & google mymaps

Google my maps has been upgraded from classic google maps to a newly layer induced maps. Previously use to import the GPS trace to the google maps simply by uploading the KML traces, but the introduction of the layered concept (similar to the GIMP tool layer) was bit confusing as was in a hurry to submit the traces which wasn't allowed in already existing layer with a trace so had to create a layer and then submit the trace i.e one trace per layer + 10 layers are only allowed in a map after that create a new map. Thinking that I was deleting the selected layer deleted the already uploaded traces which couldn't be recovered.

Use to upload the traces to the openstreetmap which was helpful in recovering almost all the traces submitted until now to mymaps in google

so now have two maps with different views for each maps. Only one at a time can be active at any given time. Everything is saved in google drive.
Maps are given below with the links
https://www.google.com/maps/d/embed?mid=zbwUx1Y9jOIs.koxc6yPzohvM

https://www.google.com/maps/d/embed?mid=zbwUx1Y9jOIs.kZ3BC36EfFNg

https://www.google.com/maps/d/embed?mid=zbwUx1Y9jOIs.ktR1Ndu_-10I

https://www.google.com/maps/d/embed?mid=zbwUx1Y9jOIs.k_aB5G-Gr56s

https://www.google.com/maps/d/u/0/embed?mid=zbwUx1Y9jOIs.kehRa8kyoTHk

https://www.google.com/maps/d/embed?mid=1IljDtgu67dL-vibgZPAUeToNmA4

https://www.google.com/maps/d/embed?mid=1Uve4_FOGIcFOJ7NTGXcIUBKXI2M

https://www.google.com/maps/d/embed?mid=1xP5JLj04zlGni2ieJ8B65xknRP8

https://www.google.com/maps/d/embed?mid=1oAgp35FNSxUb_PSD1XRHXjHEGIA

https://www.google.com/maps/d/embed?mid=1bcUbsq63QVI1pJoTG4pc-O5tm1Q

https://www.google.com/maps/d/embed?mid=1bgoGOhPKRK73yKmEZ3S37VIxxKs
Some useful links
Introduction to Google My Maps
https://support.google.com/mymaps/answer/3024396?hl=en
Improving Google Maps
https://support.google.com/maps/answer/6166252?hl=en

Setting the TL-WR843ND router as an Access point


Setting up of handful of wifi router/modem in the way it was intended(AP, modem/router, Wifi Bridge, Wifi client, WDS(Wireless Distribution System)) for, wasn't much of deal. But the various jargon and standards for 'knowledge sake' became unendingly elaborate process(Done nicely by dd-wrt). So logging what have been conceived of what have been assimilated with the block diagrammatic representation of what each stands for(image helps in visualizing than words at times) so that, these can be referred to in case the infamous forgetful syndrome.

It is useful to utilize only the Wifi Access point feature of the wireless router. Different wifi router/ router/modems have their own set of web interface to configure the wifi router as only an access point. 
The wifi router who's function is to NAT route along with that other added features like DHCP, PPPoE need not be utilized or need to be underutilized by just enabling the wifi Access point.

Before setting up the wifi router as access point, know the existing network in your premises, this will make it easier to configure the router.

It looks and sounds simple for those who know the deal but for those who aren't into such stuff don't have a clue what makes in work (this is being drafted after a simple question was raised - Is there any one solution for configuring all the routers as AP - instant answer was No because of web Interface of each router are different and sometimes its not straight forward too)

But there are other non-variable factors that can be taken into consideration at the time of configuring.

  • Determine the LAN IP address
Determine the IP address of your LAN, mostly it will be in the range 192.168.A.B.
In GNU/Linux the info can be obtained by using ifconfig, netstat -nr or route -n or ip route show  which will display the PC's ipaddress as well as the gateway. 
  • Determine whether the router is configured as DHCP server or not
Access the web interface of the router to find out whether its DHCP server is enabled or not 
if enabled 
then it will allot the ip address dynamically but would recommend assigning a static ip to the connected AP
if disabled
set static ip for the host that connects to the router
  • Configure the new wireless router/AP by connecting it to the computer
In order to configure the router the way one wants, connect it to the computer using eth cable(It will be better to refer the routers manual)set the ip address of the router, disable the DHCP server of the router. No NAT enabled. enable the wifi beacon of the router, secure it with WEP or WPA
  • Place the newly configured access point whereever you want and test its working as desired
with all things working the Access point need to be connected to the LAN
the clients (wifi devices like notebook, netbook, tablet etc) should be able to acquire the ipaddress and connect to the internet,
use ping, ifconfig/ipconfig to test the connectivity and the ip address

TP-Link TL-WR843ND Specific Connect the eth cable to the LAN port(Not to the WAN Port), accessed the webinterface, disabled the DHCP, NAT features. Enabled the WiFi so that it acts only as a broadcast beacon. Gave a static IP to the router interface. Enabled the MAC in the Pass thru MAC in the captive portal.

Annex 1
  • Router is a device which only performs routing from one network to another.such as NAT
  • Access point provides wireless access to a network. It allows multiple wireless clients like laptop, netbook, tables and other wireless device to connect to the network

Annex 2
  • 802.11b -> 2.4 GHz range, supports transfer up to 11 Mbps under ideal conditions. Transmission occurs over 20MHz of bandwidth
  • 802.11a ->  5 GHz standard, reach 54Mbps
  • 802.11g -> uses the same channels in 2.4GHz frequency band of 802.11b, but adopted the OFDM model of 802.11a so it also supports transfers up to 54 Mbps under ideal conditions
  • 802.11n -> extension of both the 2.4GHz and 5 GHz standard that uses newer technologies to increase both speed (upto 600Mbps) and range

Access Point

Wireless client Bridge mode
 Wireless client mode
Wireless Distribution System/Repeater


 Source
http://www.dd-wrt.com/wiki/index.php/Glossary
http://www.dd-wrt.com/wiki/index.php/Client_Mode_Wireless
http://www.dd-wrt.com/wiki/index.php/Client_Bridge
This MSG kept on displaying on the LCD along with the red flashing light and a sound when a print job was given to MF6550. On top of that every time the cassette was arraged and placed correctly or left deck was checked for blocked papers and closed the same page was printed everytime. The manual of MF6550 had no solution to such scenario.
Few googl'ing gave a link/pdf on "How to fix the check paper size error msg for MF5600/MF5700" series laser multifunctional.
The panels were different but it did the work.
Canon ImageClass MF6550

Carrying out the following step didn't solve the problem (as indicated by the err msg)

Check the paper settings on the Printer
For Paper Cassette the default settings are <Plain paper> and <LTR>. When you place other types of paper, the steps to be followed are
  •  Press [Additional Functions] (button 2)
  •  Confirm that <Common settings> is displayed, then press [Ok] (button 4)
  •  Press [-] or [+] to select <select paper type>, then press [OK] (button 3,4,5)
  •  Confirm that <Cassette 1> is displayed, then press [OK]
  •  Press [-] or [+] to select the paper type, then press [OK]
  •  Confirm that <Reg. Paper size> is displayed, then press [OK]
  •  Confirm that <Cassette 1> is displayed, then press [OK]
  •  Press [-] or [+] to select the paper size, then press [OK]
  •  Press [STOP] to return to standby mode
The below given step did the work
Apart from removing the printjob from desktop

Removing jobs from the print Queue (logging what could be recalled)
  •  Press [System Monitor] (Button 6)
  •  Press  [(-)] or [(+)] to select <Print Status> (Button 5 or 3)
  •  Press OK (Button 4)
  •  Press OK to delete the Print Job
ref:- Manual of the MF6550 + checkpapererror.pdf of MF5700

Upgrading D-Link DIR-456U Firmware

Hoping to find 3G only instead of Auto in the 3G Internet access option, upgraded the firmware from 1.01 to 1.02.. NO SUCH option is available.
Firmware Version: dir456u_fw102b06.rar
unrar the file will fetch a .bin file which needs to be uploaded


BSNL 3G update (SMS)
Dear Customer,
From 01-Mar-2015, your bundled free data will be credited on monthly basis instead of the earlier 12-month consolidated basis. Every month free usage will be credited and the previous month's balance will be cleared. Additional data can be availed using any data STVs.
If Data-plan Voucher is again used before the plan expiry, the benefits will be given freshly. Data-Plan 3299- 2.5GB/month,DP2299- 1.5GB/month,DP1251- 0.75GB/month. Validity-12 months."Monthly credit" will start after expiry of validity or on recharge.


  • Why opted for 3G Router?
 Was looking for a reasonable Data plan which was based on pay/usage scheme (Net won't be used frequently or at all). There was no wired broadband plan available under such scheme. The only scheme available was provided by Airtel charging 4p/10k which wasn't reasonable. BSNL was providing at 2p/10k but there was no pay/usage plan. The 3G data plan by BSNL offered an annual plan for 1251INR - 9GB for 12 months.
various 3G router were available.
Opted for a 3G router with eth interface + wifi + sim slot
Initially tried to get
D-Link DWR-512 HSUPA 3G router - could find one in the near vicinity
D-Link DIR-456U - Bought - price 4800INR

Package contained
  •  - D-Link DIR-456U Mobile Router
  •  - Power Adapter
  •  - Ethernet cable
  •  - RJ-11 telephone cable
  •  - Quick Installation Guide
  •  - Warranty & safety information
  •  - D-Link GPL code statement

 The easy step installation did not work for me.
 Initially tried out with Airtel SIM, followed the very simple instruction, could not establish data connection.
 *************** screenshot / camerashot of the router that succeeded ********************
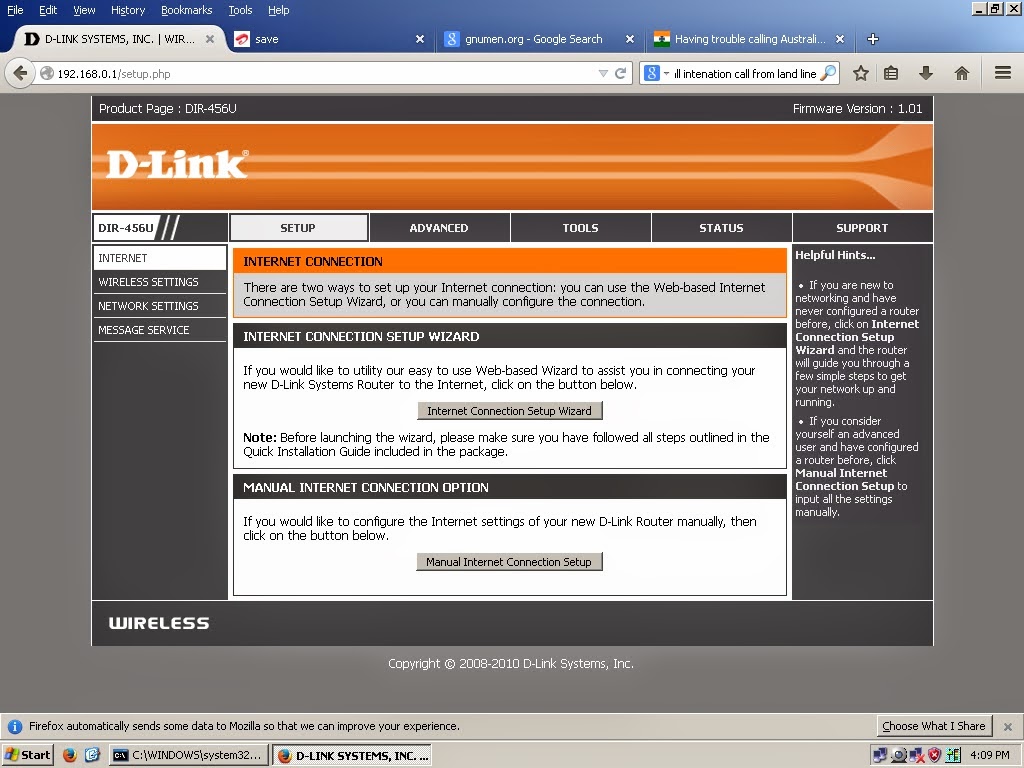
 Had to log into the router interface and run the network setup wizard.
 selected the 3G internet connection and viola the data connection was established
 The Airtel provided a 2G data connection.
 The initial webpage accessed displayed the 2G data scheme provided by Airtel.
Airtel 2G data plans
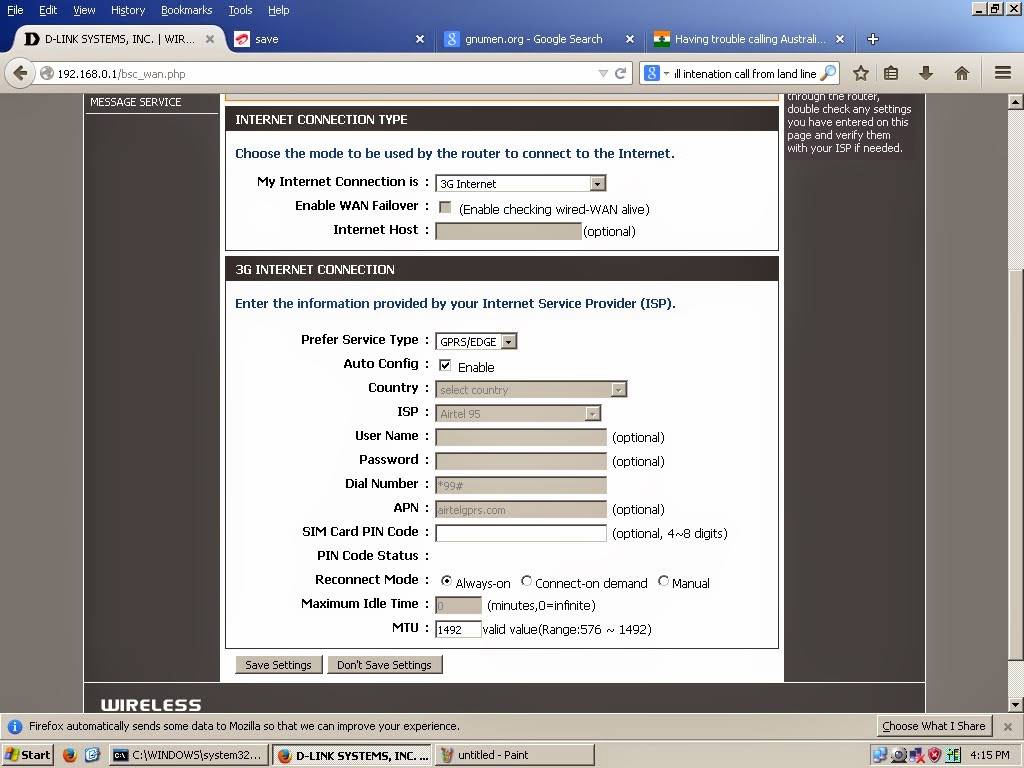
Airtel default 2G data connection type(GPRS/EDGE)

Buying a USIM was in mind as the router specifically mentioned USIM (Refered what was so special about USIM than normal SIM) 64KB vs 128KB vs 256KB

BSNL wasn't providing 3G USIM even though it was mentioned in the advertisement.(Refer below for the BSNL 3G offer)

The BSNL 3G data connection was switching between EDGE and HSPA - result drastic change in speed
It was easily noticeable by looking at the 3G led - if it were green then its HSPA/UMTS when it was orange it switched to EDGE. It can also be noticed in the router status webpage

BSNL 3G data card with connection type: EDGE
BSNL 3G data card with connection type: HSPA


HS(D/U)PA - High-Speed (Downlink/Uplink) Packet Access
UMTS - Universal Mobile Telecommunications System

Specification

GSM Band (GSM/GPRS/EDGE)
- 850/900/1800/1900MHz
- Power Class 4 (850/900 MHz)
- Power Class 1 (1800/1900MHz)

UMTS/HSUPA Band
- 850 / 1900 / 2100 MHz
- Power Class 3

Data Rates
- 6/9/11/12/18/24/36/48/54Mbps in 802.11g mode
- 1/2/5.5/11 Mbps in 802.11b mode

Standards
- 802.11g
- 802.11b
- 802.3
- 802.3u
- 150N

Wireless Security
- 64/128-bit WEP(Wired Equivalent Privacy)
- WPA & WPA2 (Wi-Fi Protected Access)

VPN
- L2TP/PPTP/IPSEC VPN Pass-through
- 5 Dedicated IPSec tunnels

Antenna
- 3 Internal antennas

Ports
- 2 x LAN (RJ-45)
- 1 X WAN (RJ-45)
- 1 X Phone (RJ-11)

USIM Slot
- standard 6-pin SIM card interface

LED status indicators
- WPS
- WAN
- LAN
- WLAN
- 2G/2.5G
- 3G/3.5G
- SMS
- Signal

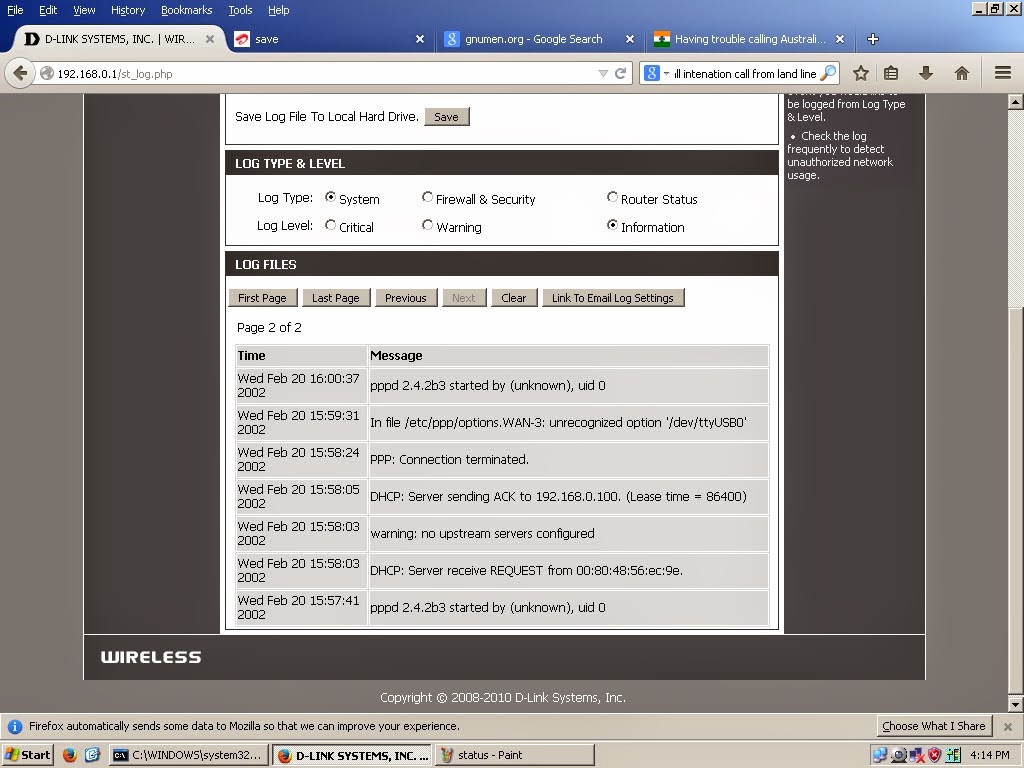
Some 3G Router web interface screenshots
Initial screen of DIR-456U
Firmware update page
Log page

ref:
DIR-456U_A1_Manual_v1.10(WW).pdf
http://en.wikipedia.org/wiki/3.5G
http://en.wikipedia.org/wiki/High-Speed_Downlink_Packet_Access


Some BSNL plans available


Contact Details
Zigma Solutions
TC 13/450, Kunnukuzhy,
Vanchiyoor
Ph: 0471-2302700, 2302701/2/3
994703270 - 40
They directed me to buy the router from
Sri Sai Cad Centre
Shop NO.123, 2nd floor,
Attukal Shopping Complex
Eastfort, Trivandrum
Ph: 0471-2479233, 9745651988
top