Restriction of views2 in Drupal6

Even the views2 of drupal6 comes with some contrains on the type of query it can execute.
for eg in case of the displaying number of nodes for a term of blog type node some of query clause or fuctions are to be used are count() and group by

select count(node.nid) as nid, term_data.name as term_data_name, term_data.vid as term_data_vid, term_data.tid as term_data_tid from node node left join term_node term_node on node.vid = term_node.vid left join term_data term_data on term_node.tid =term_data.tid where (node.status <> 0) and (node.type in ('blog')) group by term_data_name;

It was really good to have a go at drupal - Installation, setting the working env, adding modules, themes, working for the (crappy) look but behind the scene there are so many tables that are created and queried

website creation - what else do you want....

It is very simple to host a site with so many cms available that too a dynamic website. I can vote for drupal since I am using it. But if you want to get to have a look and feel of what you have in mind better be ready to get your hands dirty with scripts we can have respite not to type in long lines of code. just eeny viieny. bit html, css be ready to dive in the php pool.
It was really simple to get the look n feel with bit of css and html editing. Lots of features are available in the form of a module.
Interesting:- there are more than one way to get things done. let your imagination run wild.
I have included an image gallery with the 3rd party image hosting site (yet to acheive the desired result), contact form with webform, DPM, blog (it goes without saying) and many more.
A screenshot of creepy look of a site done using drupal.

Design your own home....

Its fairly simple to design your own home
If you want the home to be made the way you want it then make use of tool called 3D home architect.. it's really cool - it allows a 3D perspective of the design - allows us to hover and take a walk thru the virtual space.unfortunately its available for windows only. :(

No matter how far you move away from a commonly existing matter. It's going to taunt you in one way or the other.

Product: presario C700
Model: c795tu

The other day (siblings Laptop)the mic of the presario C700 on win xp - not responding (internal and external).
Reason: Other end were google talk users.
Even though the skype was properly working with responsive mic the other users were unable to configure it - Believe it or not that too on Windows.
SOooo in the end had to get the updated audio driver for make(GOOGLE TALK) it work but still some flaws are there like the external mic still conked up but internal mic is working.

Amazing thing is HP's compaq presario c700 doesn't come with the XP's support for the devices explicitly. It comes preinstalled with vista pista. Crap!!!!

http://forums13.itrc.hp.com/service/forums/bizsupport/questionanswer.do?admit=109447627+1254187535180+28353475&threadId=1278250

The above link helped a lot there is a audio_microphone-Conexant_SmartAudio221_XP_Modified.zip driver that needs to be installed.

IMP:- just by clicking the setup.exe won't setup the driver, use the update driver option available with the device manager.

"Picture is worth thousand words"


Setting up fullfledged intranet ....


I hope to setup an intranet as well as launch a site with the desired scrappy look.
Even for such a thing work has to be done... Updating my work related stuff in the intra-blog.. hope to ho(i)st task (not )as per scheduled.

screenshot of the design

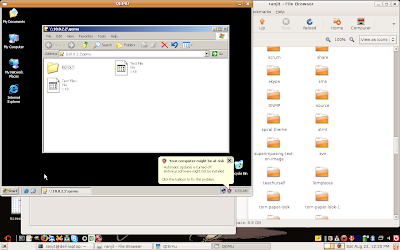
QEmu and samba / QtEmu installation[updated]


Who doesn't want to access the content from host to guest or vice versa..
where the guest OS is Windows
One of the solution is samba(Server Message Block).
though lots of helps have been provided by the linux enthusiast..
well this is what worked for me.


install samba
using apt-get install samba (or) any other way u could possible figure out

edit /etc/samba/smb.conf

[qemu]
comment = user sharable directory
browseable = yes
path = /home/sample/share
writable = yes
guest ok = yes
read only = no
create mask = 0666
directory mask = 0777
public = yes

restart the service
//not needed
//entered in c:\windows\system32\drivers\etc
//10.0.2.4 smbserver

in run dialog box enter \\10.0.2.2\qemu


[update: 5/5/11]
At the time of installing OS using QtEmu the process is pretty direct
1. creating the hard disk img which of course allots space
eg:- /home/ranjit/MyMachines/Ubuntu-9.04/Ubuntu-9.04.img
2. Select the valid CD-ROM image or physical device in my case it was CDROM
/dev/scd0
boot from CDROM
3. If necessary enable the network.
Now just click the start button. This will boot the image from CDROM
After installation
point the Image or device for this virtual device of CDROM option to
/home/ranjit/MyMachines/Ubuntu-9.04/Ubuntu-9.04.img

now the machine is ready to boot from the installed img on harddisk
top